Blacklist/Protector
On of the most interesting new features introduced in version 4.0 (and later) is a brand new automatic blacklist management system called Protector.
Protector automatically detects potential attacks, protocol violations, and other conditions that may be potentially dangerous or harmful to your secure file transfer server, and actively blocks and blacklists the IP address(es) of the client(s) that is perpetrating the action. The behavior of this Protector can be adjusted in the Security->General Settings section of the Configuration Manager, as shown here below. To learn more about Protector and its behavior, you can consult this knowledge base article online.
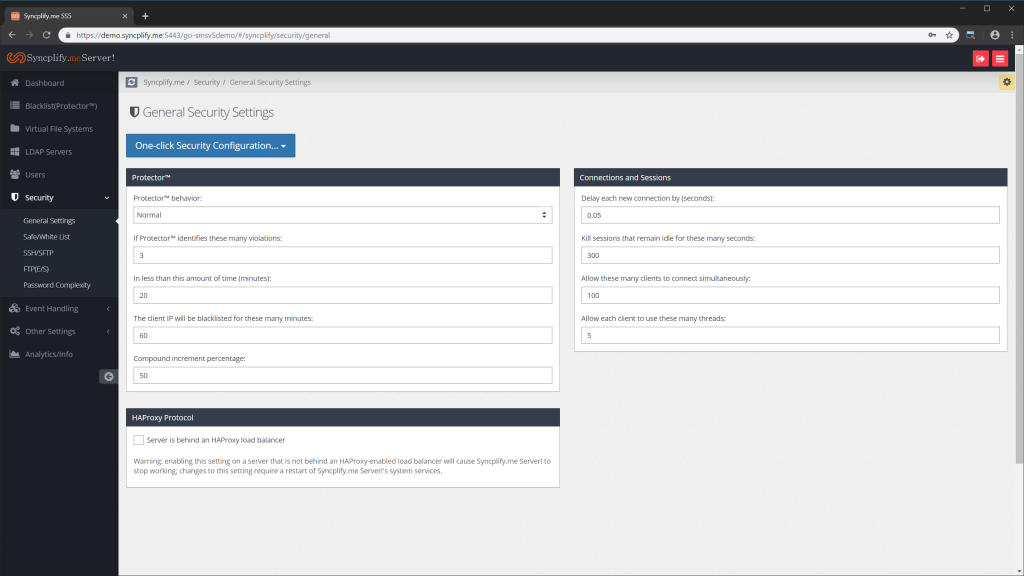
Once an IP address has been identified as an attack source by Protector, it will be placed in the blacklist, and there it will remain for as many minutes as specified in the configuration (720 minutes in our example here above). Note: if you sen the number of minutes to 0 (zero) the offending client IP will be permanently blacklisted, unless an Admin removes it from the blacklist.
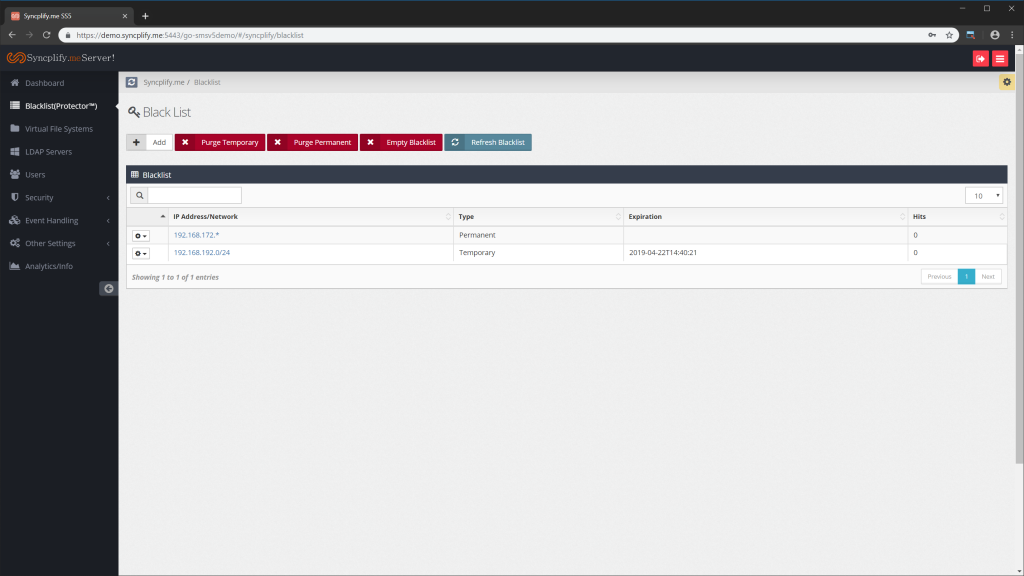
Through the Blacklist (Protector) section of the Configuration Manager you can also perform other functions, like:
•Adding a new item to the blacklist
•Purging (removing) all temporary items
•Purging (removing) all permanent items
•Emptying the entire blacklist
And via the gear-menu next to each item you can:
•Edit a specific blacklist item (modify its properties)
•Delete a single specific blacklist item
Here below you can see the modal window to add a new item to the blacklist. As you can see, as of version 4.0 on the blacklist accepts several notations, including single IP address, network/subnet-mask, CIDR, and even wildcards.
![]()